3 Thursdays Until Christmas ~ Stocking Garland
Hi, Sweet Friends!
There are only 4 Thursdays Until Christmas! For some of you, this is no trouble and you never may give it a thought until this week of Christmas.
 1 spool red ribbon or the color you choose String (I found this gold & white string at JoAnn's)
Twine the length of the mantle or shelf + 6 inches
Mini-Closepins
Inks
Now they are ready to hang on the Christmas Mantle or Shelf!
Enjoy!
*More Posts below*
The fine print: Please link with love! As with all of our posts, DIY projects featured on Styling With CJD.Sign may not be copied, distributed or reproduced without express written permission.
Love and links are always appreciated!
If you’d like to share this post, please link to this post directly for the DIY tutorial and do not include the instructions in your own post. All photos on this post are by CJD.Sign. Please give credit. Thanks so much! oxo CJ
All photos are by CJD.Sign unless stated otherwise. If you want to use my photo, please give me credit and link to my posts. Thank you, CJD.Sign
 http://stylingwithcjdsign.blogspot.com/2018/10/12-cdts-until-christmas-easy-decorated.html
11 http://stylingwithcjdsign.blogspot.com/2018/10/11-cdthursdays-until-christmas-printed.html 10
09
08 8 Thursdays Until Christmas ~ ABC Ornaments

07 7 Thursdays Until Christmas
04
03
02
01 Let’s connect!
Aside from email, social media is another great way to pick up updates from me.
Follow me on Twitter
Like my Facebook page
Pin my Pics on Pinterest
Follow me on Pinterest
Follow me on Instagram
http://customgemcutter.com
There are only 4 Thursdays Until Christmas! For some of you, this is no trouble and you never may give it a thought until this week of Christmas.
However, many of you are looking at these weeks before Christmas and making your decorations, creating gifts, and making foods to freeze, can, and give away. It is a busy time in our house from August to Christmas!
This is the 4th of 16 posts will be on making a Stocking Garland.

White paper for Stocking Pattern. Print pattern on 8x10" paper
#4 Stocking Garland
Supplies:
Brown Cardstock (JoAnn's)

White paper for Stocking Pattern. Print pattern on 8x10" paper
Ink Pen
 1 spool red ribbon or the color you choose String (I found this gold & white string at JoAnn's)
Patterned Paper for cutouts (I used antique shapes)
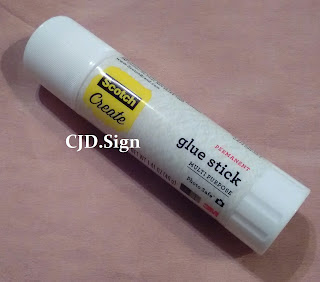
Glue StickTwine the length of the mantle or shelf + 6 inches
Mini-Closepins
Inks
1. Cut the pattern of the stocking from the white printed paper.
2. Trace & cut out 6 stockings from the brown paper (Or as many as you need to cover the length of the mantle or shelving).
3. Trace & cut the cuff from pattern onto the light colored pattern paper.
4. Cut out shapes for the stocking from the patterned cutouts paper..
5. Assemble the stocking by gluing the cuff on to the stocking with the glue stick.
6. Glue the cut uots in a nice pattern on the stockings. For instance all my stocking have a clock.
7. Measure across the middle of the cuff and cut the ribbon into strips that measured length. Cut 1 ribbon foreach stocking.
8. Glue a line down the middle of the ribbon and extra glue at the ends.
9. Place on the cuff in the center, matching the ends.
10. Wrap the string around the cuff and back of the stocking. Either tie the string in a bow or knot with long ends. Glue stick under the knot or bow.
11. While the stockings are drying, measure the twine 1 1/4 times the length of the mantle or shelf and cut 1 piece. The stockings will be hung to the twine by the mini-clips. Tie a loop at both ends.
6. Use the ink pads to add color to the postcards, and around the edges to highlight.
7. Cut 6 pieces of twine/string 3" long. 8. Bring the two ends together at the top of the twine/string. Tie a small knot at the ends. Slide string under the mini-close pin.
7. Cut 6 pieces of twine/string 3" long. 8. Bring the two ends together at the top of the twine/string. Tie a small knot at the ends. Slide string under the mini-close pin.
Now they are ready to hang on the Christmas Mantle or Shelf!
All photos are by CJD.Sign. If you want to use my photo, please give me credit. Thank you.
Enjoy!
*More Posts below*
The fine print: Please link with love! As with all of our posts, DIY projects featured on Styling With CJD.Sign may not be copied, distributed or reproduced without express written permission.
Love and links are always appreciated!
If you’d like to share this post, please link to this post directly for the DIY tutorial and do not include the instructions in your own post. All photos on this post are by CJD.Sign. Please give credit. Thanks so much! oxo CJ
All photos are by CJD.Sign unless stated otherwise. If you want to use my photo, please give me credit and link to my posts. Thank you, CJD.Sign
Enjoy!
12
 http://stylingwithcjdsign.blogspot.com/2018/10/12-cdts-until-christmas-easy-decorated.html
11
 http://stylingwithcjdsign.blogspot.com/2018/10/11-cdthursdays-until-christmas-printed.html 10
09
08 8 Thursdays Until Christmas ~ ABC Ornaments

07 7 Thursdays Until Christmas
6 Thursdays Until Christmas ~ Star Paper Ornaments
055 Thursdays Until Christmas ~ Patterned Paper Postcard Ornaments
04

4 Thursdays Until Christmas ~ Christmas Chargers
03
02
01 Let’s connect!
Aside from email, social media is another great way to pick up updates from me.
Follow me on Twitter
Like my Facebook page
Pin my Pics on Pinterest
Follow me on Pinterest
Follow me on Instagram
http://customgemcutter.com


 h
h


.JPG)

Comments
Post a Comment