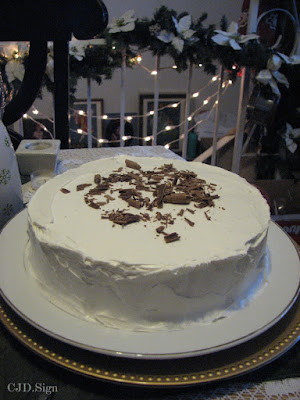
Red and Green Velvet Iced Cake ~ Friday Foods
It's Friday Foods again! We love cooking and eating! Who doesn't?
So this Friday Foods we will show you how to make a Red and Green Velvet Iced Cake.
You will need:
a Holiday Velvets™ Duncan Hines or any other Velvet cake mix
Chocolate to shave(bar or shaped)
2 cans of white icing
 |
| You need this cake mix. |
 |
| Any solid Milk Chocolate will do. |
So, looking at the first two items seems quite weird, however, bare with me when I say, you can often get cake mixes and chocolates discounted quite a bit after a Holiday. Stock up for a Special Treat later in the year!
Start by making the two layers of Red and Green Velvet Cakes in two pans. Read directions on the box. If your cake rises a bit in the middle, level the cakes by laying a long bread knife over the edge of the cake top. Gently slice across the top of the cake as if you were cutting off the "crust point". Put the "crust point" onto a dish for those who love a taste before the cake is done... Honey?
Now set the cake onto a plate and put a thin layer of icing around the edge and across the top. You may or may not have icing from the first jar left after icing the first layer.
Next, you will place the second cake (with the crust point cut off, as done with the first cake) on top of the iced cake. See the photo above. Use the rest of the icing to ice the second layer and to fill in the edges and the space between each cake.
 |
| Open the Chocolate. Mine here is a bunny and this shape works great for shaving the pieces. |
 |
| Holding the larger piece in one hand and the peeler in the other, shave in a downward motion. making rounds and shaved pieces of chocolate |
 | ||
| Place the unused chocolate in the package for easier use later. I store mine in the refrigerator for up to a year. |
That being said, mine never lasts that long, someone usually finds it! Hence my advice to stock up on this at the end of a Holiday!
Take a spoon and spoon the chocolate shavings onto the cake top in a pattern that is pleasing to you. I used an old fashion looking cake design from a Victorian Cook Book. I do like this design and in addition to this, a dollop of whipped cream in the center was also suggested. We will be adding additional shaved chocolate to the top of the first layer, just after icing, to make it a bit fancier.Using a spoon really helps keep the shavings in a more controlled shape. Start with a little,
adding a little bit at a time to fill in the shape.
Stop the shavings when you desire. I have also made this frosting style with pressed shavings on the sides. Using waxed paper will help to press the shavings into the sides of the cake edge. Turn the plate as you go to get the best coverage.
Here is the first slice just for YOU!
I do hope you enjoy our Friday Foods Red and Green Velvet Iced Cake!
Have a Wonderful Weekend!
Have your cake and eat a piece too!
Enjoy!God Bless You!
Here are a few of our Friday Foods of the Past! Try cooking something new today!


.JPG)

Comments
Post a Comment