Canning Green Beans
Today, we are canning Green Beans! It's a glorious 56 degrees out and a perfect time for canning. I can open up the house and let all the heat escape before noon. Hubby has everything ready and we will begin!
 |
We have no clue as to what happened this year, the weather was a contributing factor, but other gardeners in the area had the same problems. So, it wasn't a surprise to see our neighbors doing the same thing as we were; buying our canning veggies at the Farmer's Market.
 |
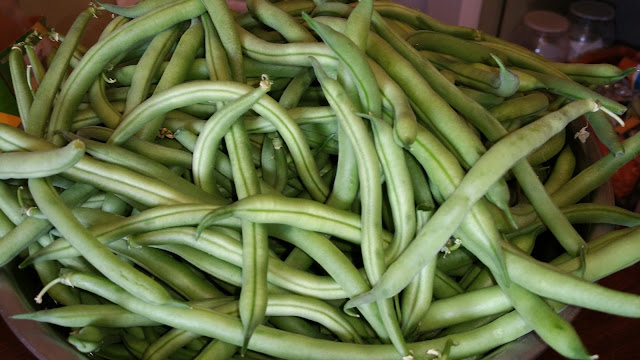
| These green beans were wonderfully long! The average length was 7 inches and the longest was 10inches. |
 |
| These are the few green beans we grew this year. |
Directions:
- Make sure the beans are cleaned and rinsed again,
- Trim the curled end tips. Don't use any beans that are droopy or underdeveloped.

- Now, cut off the other ends of the green beans. If the beans are string beans, then pull off the strings when you cut the ends.
- Cover the beans with hot water and put on the stove to boil.
- Set the temperature to High until the beans are at a rolling boil,
- When the water comes to a rolling boil, set the timer for 5 minutes and boil the beans.
- Turn off the heat and ladle into the hot jars.
- Pack the hot beans into hot sterilized jars, wipe the lip of each jar, add 1 tsp of canning salt to each jar, set the lid seal on each jar, and place the ring on each jar lid seal.
- Place the jars into the hot water of the Pressure Canner.
- Process the jars of beans according to this chart and your area.
We are at high altitude and our processing time may be different than yours.
- Process the jars as per directions on the chart.
- After jars have processed the right amount of time, leave them in the Pressure Canner until the steam has released and the canner has come to room temperature. This timing will vary but don't rush it or you could increase the headspace in the jars and have unacceptable canning. Just be patient and do something else while you wait for them to cool down.
- Remove the jars to a doubled tea towel and let sit until all the lids have "popped" or as some old-timers say, "Pinged".
- Place the jars in a cool area for storage. Use within a year.
Green beans can be trained to climb up twine tied to frames or they can climb on wire trellises.
Chickens in the garden! Love it!
Honestly said, the homegrown and home-canned green beans are the best tasting green beans! Our families favorite vegetable are green beans and we have them a few times a week.
We have been growing green beans since 1987 and even younger with our family gardens as children. My earliest garden memories were with my Dad. We would go out to the garden with a bucket of fresh cool water and a knife to cut off the fresh veggies. We'd dip them in the water and eat them right there in the garden! I loved it! I still love it!!
And 2015 year's green string-less pole beans were so deliciously sweet and crisp that we would often put them in our salads! I have to say that the soil and the amendments that are added really do make a difference in how the beans taste and how they produce.
 |
| Canning Foods for Later ~ Friday Foods |
Our green beans, Blue Lake Special, from 2017
Our canned green beans.
This is our first canning batch of green beans.
Ideally, we like to have at least 58 jars of green beans to last the year.
Try preserving your own garden beauties!
Or pop over to the Farmer's Garden for some veggies and fruits to can, preserve, or dehydrate!
 |
Canning Stewed Tomatoes |
Here are some Favorited Posts:
 |
Canning Squash and Zucchini |
 |
Canning and Jars For Dry Herb Storage |
 |
Canning Foods For Later |
 |
Can You Dry Herbs In A Food Dehydrator? |
 |
Company Green Beans ~ Friday Foods |
 |
What do you add to a compost? |
Enjoy!
Our Sponsor: Custom Gem Cutter


.JPG)

https://www.pinterest.com/pin/248542473161116780/?nic_v3=1aQuz6vh7
ReplyDeleteThe above link is for Altitude Canning Charts for Water Bath & Pressure Canning.
Delete