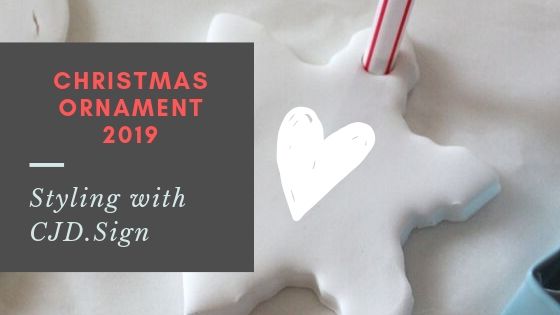
Salt Dough Ornaments ~ 4 Creative Day Thursdays Until Chrismas
Hi, Sweet Friends! It is the November 28th Creative Day Thursday and 4 Weeks Before Christmas!!

Snowmen made with Pink Himalayan Sea Salt and stamped with ink.
This year, I'll be doing a different project each week.

Last year, on Creative Day Thursdays Until Christmas, I did mostly Christmas Ornaments and Decor. LINK

This is the 12th week of the 16 weeks before Christmas and we will be making Salt Dough Christmas Ornaments in the shapes of Angels and Balls for 2019.
 |
| I have used gold ink and teal ink for the Angel Ornaments. |
The Ball ornaments are made using a glass and cutting circles in the dough. Then I used a laser-cut rolling pin to add a 3D-design to the dough balls. The patterns I am using are from Pinterest
Pinterest.
Supplies Needed:
Salt Dough (below)
- drinking straw or toothpick
- cookie cutters, round glass, or embossed rolling pin
- gold acrylic paint or stamping inks or markers
- paintbrush or paint sponge
- rubber letter stamps
- ribbon, twine, or string
- foil for a cookie sheet
- rolling pin
- parchment paper
 |
| I added gold ink to the center of the heart. |
 |
| Press finger tip into the wet dough to make the heart. |
Salt Dough
Ingredients:
- 4 cups all-purpose flour
- 1 cup salt or Pink Himalayan Sea Salt
- 1.5 cups warm water
Instructions:
- Preheat the oven to 250 degrees Fahrenheit.
- Using a Christmas cookie cutter, cut out the shapes for the salt dough ornaments.
Handprint Ornaments or Thumb Print Hearts
Use these directions, except make the dough 1/2" thick and round shape when rolled out. Press the hand into the dough or fingertip to make a heart shape. Then continue with the baking process below.
5.b Have the child place their fingertip print into the salt dough ornament making a heart by overlapping the fingerprints.
- Bake for 1-2 hours. If the ornaments are still doughy, put them back into the oven for another hour. (This time will depend on the thickness of how long to bake the ornament. The thinner ornaments will take less time but thicker will take more). Continue this process until the dough is completely dry, 30 minutes at a time. DON't OVERCOOK or they will BURN!
- If you encounter too much puffing, roll out thinner ornaments and this will help reduce the puffing. If the ornament is still a bit doughy, bake for longer or let sit out a few days to harden before decorating. Bake them at 250℉ (degrees Fahrenheit) for longer and let them air dry for a few days. I did not seal the ornaments with the Mod Podge until two weeks of air drying on the top of the refrigerator, with the decorations on a rack.
**NOTE: When running out of Mod Podge, take tacky glue and water at a ratio of 3 to 1 (glue to water) and mix it well. Put it back into the old Mod Podge bottle or use an empty medicine bottle.
- Decorate by using ink pads with stamps or markers.
10. Coat with Mod Podge finish. This is very important as moisture can cause them to develop mold. ***Be sure to coat both sides, all the edges, and inside the twine hanging hole. 2 full coats of Mod Podge is best. Dry for a day in between each coating.
- I'm sending some out to the East Coast of the USA and will be doing two full coats of Mod Podge on each of the ornaments in the box.
I do hope you liked this project. This one has actually taken a bit longer as Lil Grand has not been with us as much as we would have liked.
We caught some Flu, followed by a horrible virus, and was down for a bit. The Northern School District closed down for over a week to decontaminate the schools, as there were over 100 teachers out sick and over 1,000+ Students out sick. I'll post up photos when the tree is fully decorated!Let's get creating! I do put on the Christmas Music (Early, I know, I know!) but it helps get me in the Christmas Creative Mood. And this being Fall, I have my cup of Pumpkin Spice Chai Tea on the table to enjoy! The aroma is fantastic!
This is the list of the 16 Creative Day Thursdays Before Christmas💘 LINK
16. Christmas Chocolate Covered Cherries
15. Christmas Lavender Bath Bombs
14. Christmas Stockings
13. Christmas Aprons
12. Christmas Table Cloth & Napkins
11. Christmas Place-mats
10. Christmas Wreath
9. Christmas Cards
8. Christmas Door Sign
7. Christmas Throw Pillows
6. Christmas Banner
5. Christmas Dog or Cat Vests
4. Christmas Salt Dough Ornaments
3. Christmas Centerpieces
2. Christmas Decor & Tree
1. Christmas Present Wrapping
Enjoy!💘 Merry Christmas!💘
Check out these other great ideas from Pinterest.
Heavenly Deposit is a faith film about finding hope and faith in a time of need! It can change your life! Get your copy today! I love our movie and have watched it over and over again! This is a real-life story that touches your heart and leaves you knowing that God is there, He is listening, He wants the best for you, and He loves you because you are His Child. You can watch the official trailer of Heavenly Deposit HERE!
Join me in being Creative!
Let’s connect!
Enjoy!
Aside from email, social media is another great way to pick up updates from me.
Follow me on Twitter
Like my Facebook page
Pin my pics on Pinterest
Follow me on Pinterest
Follow me on Instagram
Follow me on Photography Talk
Our Sponsor: Custom Gem Cutter
Enjoy!


.JPG)

Comments
Post a Comment